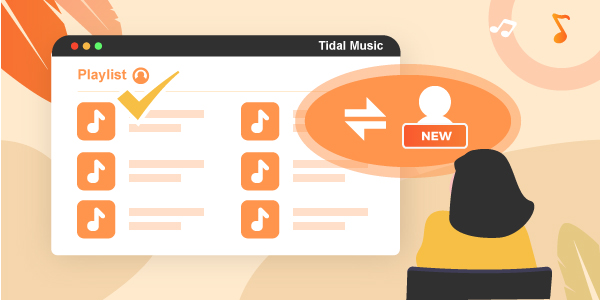
When it comes to enjoying their favorite music, people generally prefer to switch from physical formats, or they opt for downloading music streaming services. There are lots of music streaming apps that can offer various features based on the subscription you have purchased. Among all, Tidal has emerged as one of the most popular music streaming platforms and provides users with millions of songs.
The platform has more than 250,000 videos and 60 million streams with lossless high-fidelity quality songs. Tidal is highly customizable and comes equipped with smart and advanced algorithms to understand the users’ choices and suggest the content accordingly. However, some factors may make the users transfer Tidal playlist to new account.
For example, some may shift to other music streaming services due to their budget consideration. And others may want to enjoy the music offline. That is a sad story for the users who have created multiple playlists on their Tidal account and now want to switch to a new account without sacrificing the playlist. No matter what the reasons are, the major question here is how to transfer playlist from Tidal to new account.
Well, you don’t have to worry about this as here you will find some methods to transfer tracks from an old Tidal account to a new one. Let’s explore those methods.
Part 1. Copy Tidal Playlist from Tidal Web Player
This is one of the simplest methods to move Tidal playlist to new account. For this, you don’t need to use any extra tools or programs. Just a few clicks and you will be able to successfully import the playlists and transfer that to your new Tidal account. Here are the steps that you will have to follow.
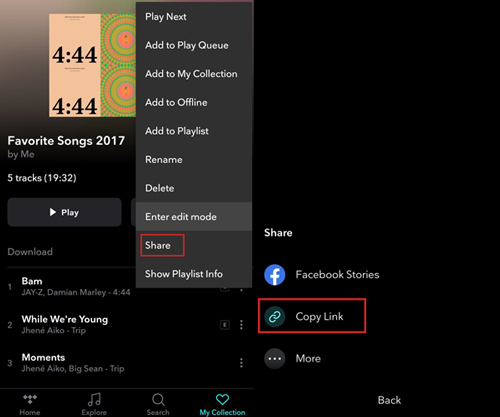
Step 1. First of all, you need to open the Tidal Web Player and then log into your account. Now click on the playlists you have created.
Step 2. Now you will see the playlist URL. Copy the URLs of the respective playlists.
Step 3. After that, log in to the new Tidal account from your desktop app.
Step 4. Once done, past the playlist URLs on that app.
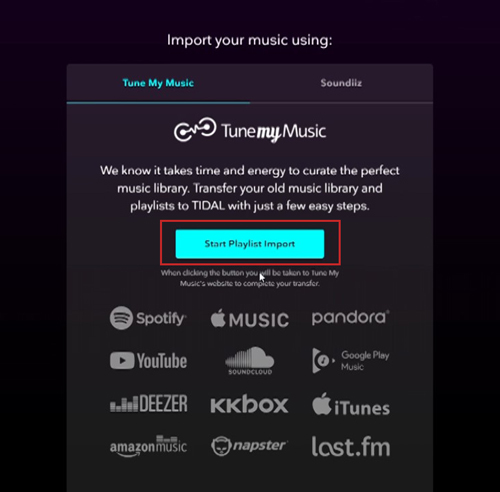
There is another way to transfer Tidal playlists to a new account, and you can also follow these steps below:
Step 1. Visit the Tidal playlist import option.
Step 2. Click on the Start Playlist Import option.
Step 3. Choose the current music service provider from the list.
Step 4. You can then choose to transfer the file from the existing account or copy and past Playlist URLs. Choose the method as per your preference. Then log in to the Tidal account.
Step 5. You will see the playlists. Choose them and click on the Transfer Playlists to Tidal option.
That’s it. You have successfully transferred your playlist to a new Tidal account. Well, even though the process is easy, this method won’t work if you want to download the music to your local drive. The second method focuses on that. Have a look.
Part 2. Transfer Tidal Playlist to New Account via Downloading
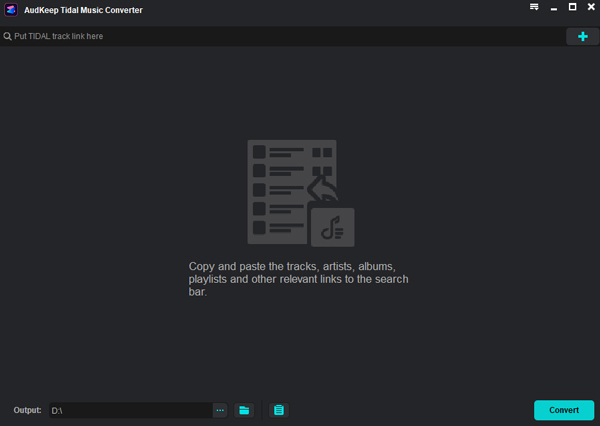
It is a fact that creating a playlist from scratch can be time-consuming and very frustrating. So, people try to use their existing playlists on different platforms. But first of all, you need to download and convert those files, and for that, you can always go for AudKeep Tidal Music Converter.
Using this smart, you can make sure that the Tidal music files are 100% lossless. Except for the Tidal playlists, you are able to transfer Tidal albums, tracks, mixes&radio, and more audio content. You can convert these audio content from Tidal to MP3, AAC, M4A, FLAC, and other most-used formats.
With cutting-edge converting skills, AudKeep supports 5X conversion speed for converting Tidal audio files. Besides, you can reset other output settings like bitrate, sample rate, and sort the output files by artist or album as you required.

Key Features of AudKeep Tidal Music Converter
- Download and transfer Tidal playlist to new account for listening
- Convert Tidal songs at 5X speed faster than any other converter
- Save 100% ID3 tags and lossless audio quality of Tidal playlists
- Convert Tidal to MP3, WAV, FLAC, Lossless with ID3 tags retained
Here is how you can use this tool to import playlist on Tidal to new account.
Step 1 Download and open AudKeep software
Open the AudKeep app and sign up to create a new account. If you already have an account, then click on the login and enter your username and password to enter your account.
Step 2 Configuring Tidal output format to Lossless
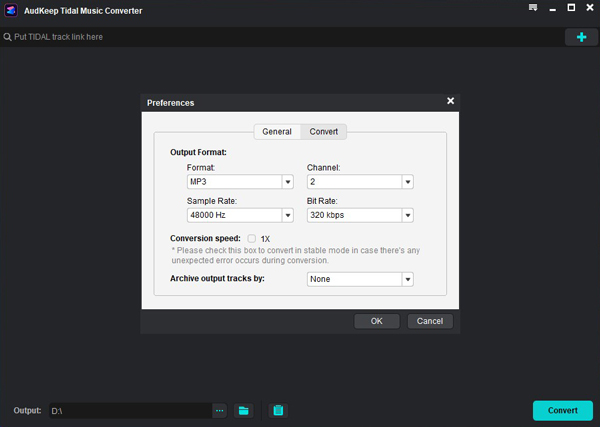
Click on the Menu option and then click on the Preferences option. Now, you need to click on the Advanced option and choose the desired output option. You can change the bit rate and other parameters.
Step 3 Add Tidal playlists to AudKeep for conversion
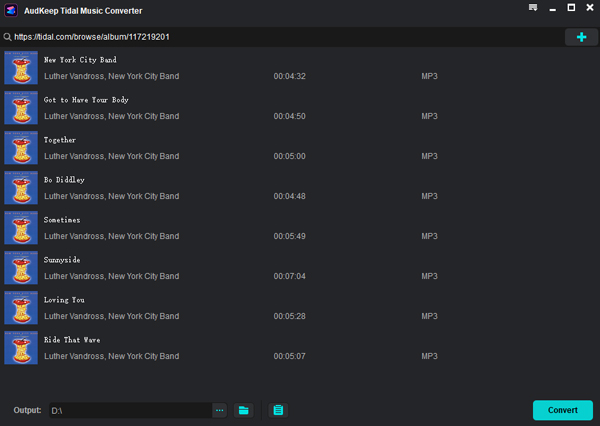
Now you need to add Tidal music to AudKeep by choosing the playlist that you want to convert. Just select the tracks from any Tidal playlists or albums in the inserted Tidal music library on AudKeep.
Step 4 Convert Tidal playlists, albums, mixes&radio, etc.
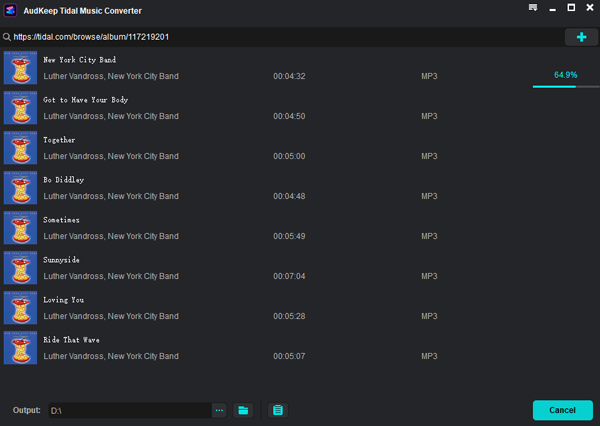
Once you select those tracks or playlists, click on the Convert button to start converting the playlist. Once done, you can now listen to your favorite songs offline.
Besides, you can also transfer those files to your desired music streaming platforms, or you can also export Tidal playlist to new account.
Import Tidal Playlists to A New Account
Step 1. Open your Tidal app.
Step 2. Now, click on the Start Playlist Import option.
Step 3. Then, you need to click on the Upload option.
Step 4. You can choose the converted files. It supports TXT, CSV, M3U, M3U8, PLS, XML, WPL, and XSPF file formats.
Step 5. Now, choose the playlists that you want to move and click on the Transfer To Tidal option.

That’s it. You have now successfully imported your favorite music files to Tidal.
Part 3. Conclusion
All the above-mentioned methods can be used to transfer Tidal playlist to new account. But if you want to export the playlist to your PC and enjoy them without dealing with any restrictions, then it is advisable to use AudKeep, the best Tidal playlist transfer app. The tool will offer you an easy experience for music downloading without affecting the original sound quality. Go on and try out these methods now.