The Tidal app is an outstanding entertaining platform that offers unique playlists for music lovers. There are options to subscribe and become premium users to extend the access features. You can also cancel Tidal subscription and switch to free versions to connect with the desired playlists on the Tidal platform.
In this article, you will learn how to perform the cancellation of Tidal subscription on various platforms like websites, and Android gadgets. Connect with this article to get some valuable insights on this cancellation process. It is enough if you follow the below-discussed steps for successful completion of the subscription cancellation. You will discover a new program that works precisely with the Tidal app and learn about it in detail by scrolling down.

Part 1. How to Cancel Tidal Subscription on Website
How to cancel Tidal Premium/HiFi subscription at Webpage, follow the below guidelines carefully.
Step 1: Go to the webpage of Tidal and log in using your username and password.
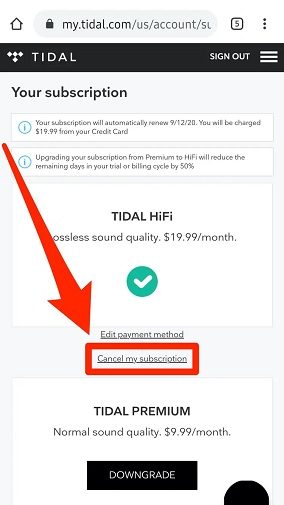
Step 2: Next, tap the Subscription option and then press ‘Cancel my Subscription’. Finally, confirm the cancellation process by clicking the OK buttons in the process wizard.
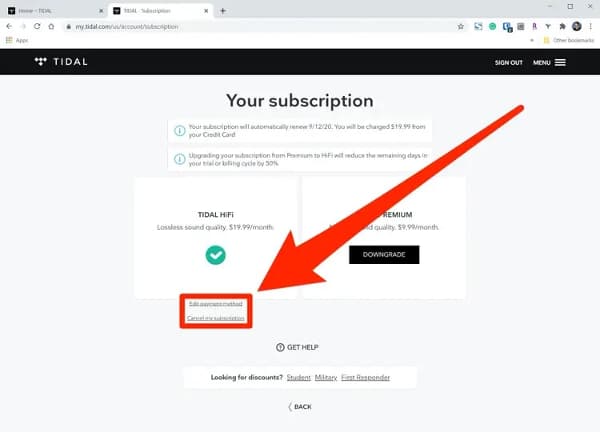
These are the simple steps to cancel a Tidal subscription using the official webpage of Tidal.
Part 2. How to Cancel Tidal on iPhone/Android
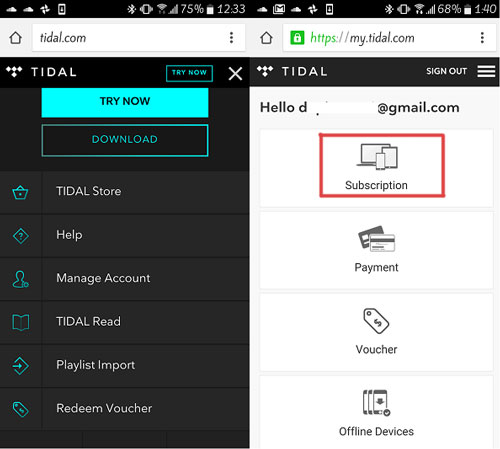
Here, you will be discussing how to deactivate the Tidal subscription on smartphones like iPhone and Android.
Step 1: Launch the Tidal app and enter the login credentials. Then, click ‘My Collections > Settings > Edit Profile > Manage Subscription’.
Step 2: Then, tap ‘Subscription > Cancel Subscription’. Thus ends the process of subscription cancellation process at the Tidal platform.
Part 3. How to Cancel Tidal Free Trial
The Tidal trial period lasts for 30 days and after that, you will be charged for using the Tidal application. To cancel the free version of this program, then follow the below guidelines.
Step 1: Go to the Tidal webpage and log in to your account.
Step 2: In the Subscription option, select ‘Cancel my Subscription’ to deactivate the trial version of this tool.
Now, you must be familiar with how to cancel the free version of Tidal to avoid charging issues after the expiry period. Do not forget to deactivate the free version of the Tidal app on time, else you will be subjected to subscription billing issues.
Part 4. How to Cancel Tidal with Sprint
If you have a registered account through Sprint device and handling the fees concerning the Sprint bills, then you can follow the below steps to complete the cancellation process.
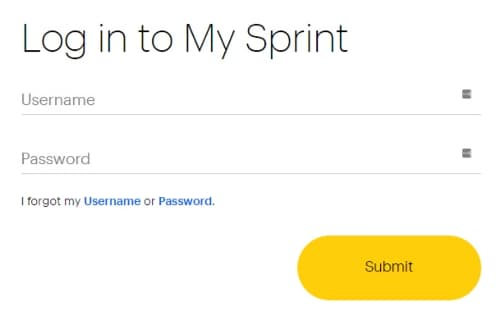
Step 1: Go to the webpage www.sprint.com/Tidal and log in to your account. Then, tap the My Sprint app on your gadget.
Step 2: Connect with Sprint Customer support and get help from the live assistant to complete the cancellation process.
Use the above steps to complete the cancellation process quickly. It is one of the best ways to cancel Tidal account membership using Sprint. The above procedure is possible only if you are a registered user of Sprint.
Part 5. How to Keep Tidal Music Locally after Tidal is Canceled
To retain Tidal music locally, you need a third-party program AudKeep Tidal Music Converter. It is a sophisticated tool that helps you to save the Tidal playlists locally for future use. This application helps you to convert the files to desired formats and the conversion takes place at a faster rate. During the conversion and download process, the quality factors are retained. The downloaded Tidal songs are managed in a structured format for quick access. It is an exclusive app for the Tidal environment that helps you in the offline listening of your favorite songs.
The AudKeep Tidal Music Converter helps the users to convert the Tidal playlists to the desired file format like FLAC, MP3, WAV and M4A. This app ensures the entire conversion takes place without any data loss. Moreover, the conversion procedure does not affect the quality of the audio file at any cost. You can witness the quick conversion and download process of Tidal playlists occurring precisely.

Main Features of AudKeep Tidal Music Converter
- Converts the Tidal playlists to any file format as per your needs
- Allow to reset output file format and convert at 5X times faster
- Retains the metadata and ID3 tags of the playlists for future reference
- Ensure lossless conversion of Tidal songs and save for quick access
These are the incredible functionalities of the AudKeep Tidal Music Converter program. You can choose this tool if you want to listen to the Tidal playlists in offline mode. It decrypts the protected format of the playlists and aids in playing them on any media player flawlessly.
The stepwise instructions to download Tidal playlists on the computer even after canceling the subscription using the AudKeep Tidal Music Converter program.
Step 1 Download the AudKeep application
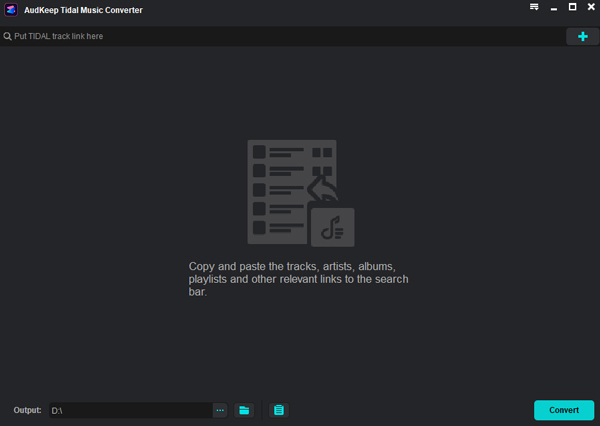
Visit the official webpage of the AudKeep Tidal Music Converter app and download the correct version of the tool according to your system OS. Then, install and launch the application. Then, click the Login option at its home screen to sign in with your Tidal account.
Step 2 Set the output attributes for Tidal music
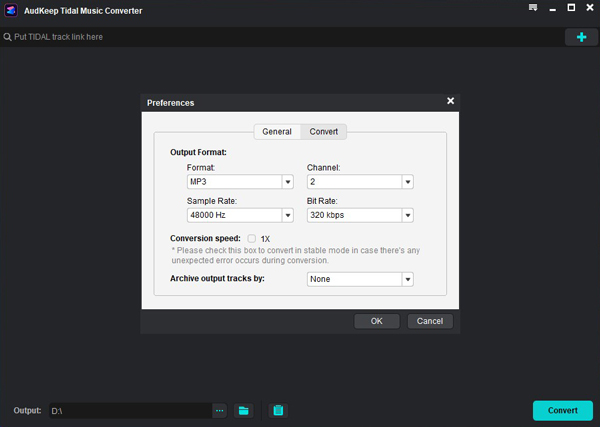
Next, register the tool using the Licensed Email and Registration Code to access all the features of this program. Then, tap the Preference icon to set the conversion output attributes like output file format, bit rate, sample rate and conversion speed. You can also set the output path to store the converted playlists in your system drive. Finally, save the changes by tapping the OK button.
Step 3 Start the conversion of Tidal music
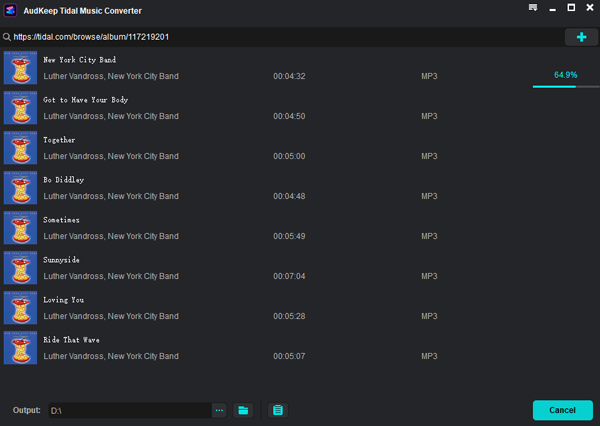
Now, tap the Music icon and add the desired playlists from the Tidal platform into the AudKeep Tidal Music Converter application to begin the conversion process. It is difficult to import individual songs from Tidal space. You must create a playlist consisting of your favorite songs to perform this conversion and download process. Finally, hit the convert button to start the conversion and download process of the added playlists into your system drive.
You must wait until the conversion and download process completes successfully. Then, check out the Tidal songs at your local drive. The playlists remain forever for quick access and you can listen to them even in offline mode.
These are the efficient way to retain the Tidal playlists in your system drive despite the subscription cancellation procedures. Use the AudKeep Tidal Music Converter program and enjoy the flavor of the playlist anytime on any media player.
Part 6. Conclusion
Thus, this article had given valuable insights about Tidal canceling the subscription. Choose the respective ways to cancel the subscription scheme of the Tidal platform. Follow up the above-discussed steps to end up with a successful cancellation procedure. Use the AudKeep Tidal Music Converter app to get the best out of the Tidal playlists. Overcome the protected format of the Tidal songs and store it on the local drive for future access. Connect with the AudKeep Tidal Music Converter app for optimal utilization of the Tidal environment. Stay tuned for exciting facts on the exclusive tool for the Tidal application.